In this lesson we will be setting up your Hostinger hosting and registering your domain name on Hostinger.com and we will also be setting up a domain name email for you to use such as info@ your yourname@.
LET’S GO!
✅ Please click here to go to Hostinger.com.
✅ Click on the purple button that says “Claim Deal”
✅ Choose the “PREMIUM” and click the add to cart button.
✅ Choose 12 months, you can choose 24 or 48 months if you want more of a yearly discount.
✅ Scroll down to the “Create Account” area and choose an email address and password you will use to login to Hostinger.
✅ Select your payment method and enter in your address details.
✅ Click on the button “Submit Secure Payment”.
✅ Login to your email account and verify your account.
✅ Record user/pass is ASANA, the video is below.
Instructions to setup your hosting, register a domain name, setup WordPress and a domain name email address.
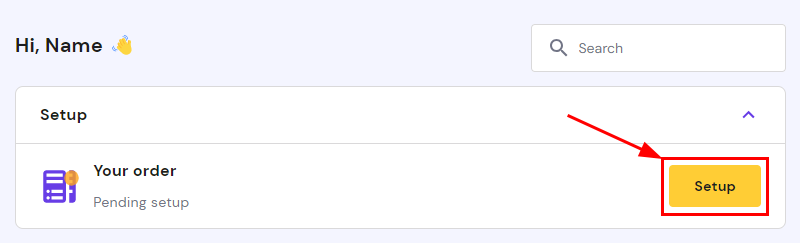
✅ Clicking on Setup will initiate the onboarding, which will guide you on how to get your hosting order up and running.
✅ Once you’re on the Hello! page, click on Start now to provide more information about your project. Here, you can indicate if you’re creating: Click on “A new website for yourself”.
✅ Then choose: Create a new website – choose this option to start building a totally new website
✅ Then choose: WordPress – choose this option because we are setting the landing page up on WordPress CMS.
✅ You’ll be asked to create a user for your platform by entering an email and a strong password before moving to the next step.
✅ Record this username and password in ASANA !!!
✅ Their is the option to add some recommended plugins as well as select a template if you go with WordPress.
✅ CHOOSE TO SKIP BOTH OF THESE STEPS
Now, it’s time to specify the domain name of your website.
✅ Let’s register your new domain name: You will be able to choose an available domain name and extension (e.g., .COM, .ORG, .NET, etc.), and then purchase and register your new domain name.
✅ If you do not have your domain name chosen yet go back to this lesson in ASANA to create your new name.
✅ Before completing the setup process, a summary, including the server location and domain, will be displayed. If CMS is selected, it will also contain the name of the chosen platform and the admin email. You can change any of these settings before finishing by clicking on the edit icon:

Now, your hosting plan is active!
For WordPress, the setting up process will take a few minutes to complete, and after that, you can edit your website by going to your domain name plus adding the /wp-login.php to it and logging in with your saved credentials in ASANA.
Setting up and logging into your email address.
You can easily create and manage Hostinger email accounts from the Emails section of hPanel:
-
If it’s the first time you’ll be creating email accounts for a domain or subdomain on the Hostinger Free email included with your hosting plan, click on Setup next to Set up free email service:

How to Create an Email Account
In order to add a new mailbox, click on Create email account:

✅ Insert the email name such as info or your name, create a password that meets the requirements, and click on
the Create button.
✅ The Manage Email Accounts section provides you with the information about your email account name, status, disk usage, a quick jump to webmail.
✅ Record this link: https://mail.hostinger.com/
Plus your username and password for this email in ASANA in the login credentials task.
✅ Now you can use and access your email from the web browser at any time.
How do I add my email address to my mobile phone or tablet?
Instructions if you have an iPhone.
Instructions if you have an Android.